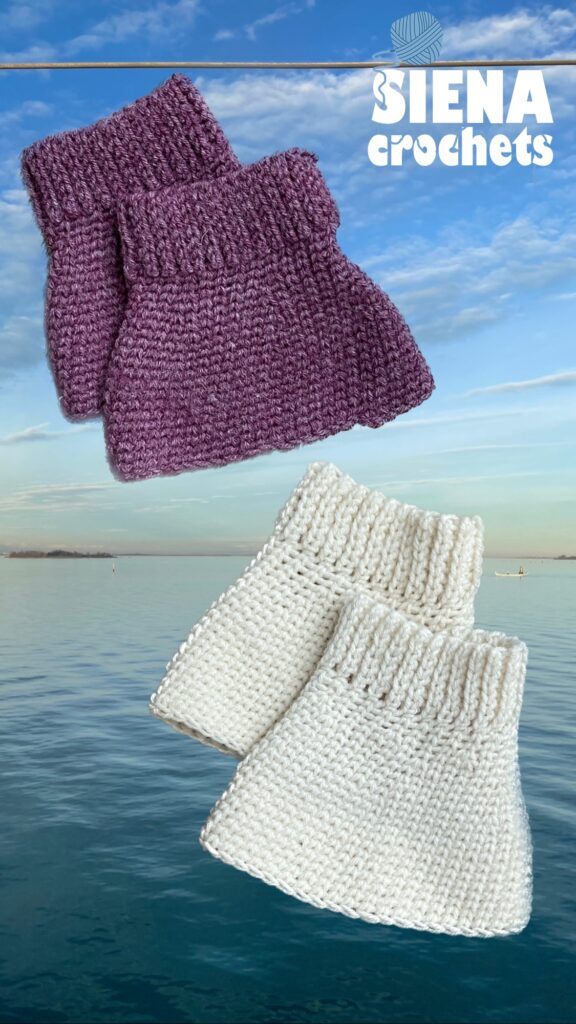
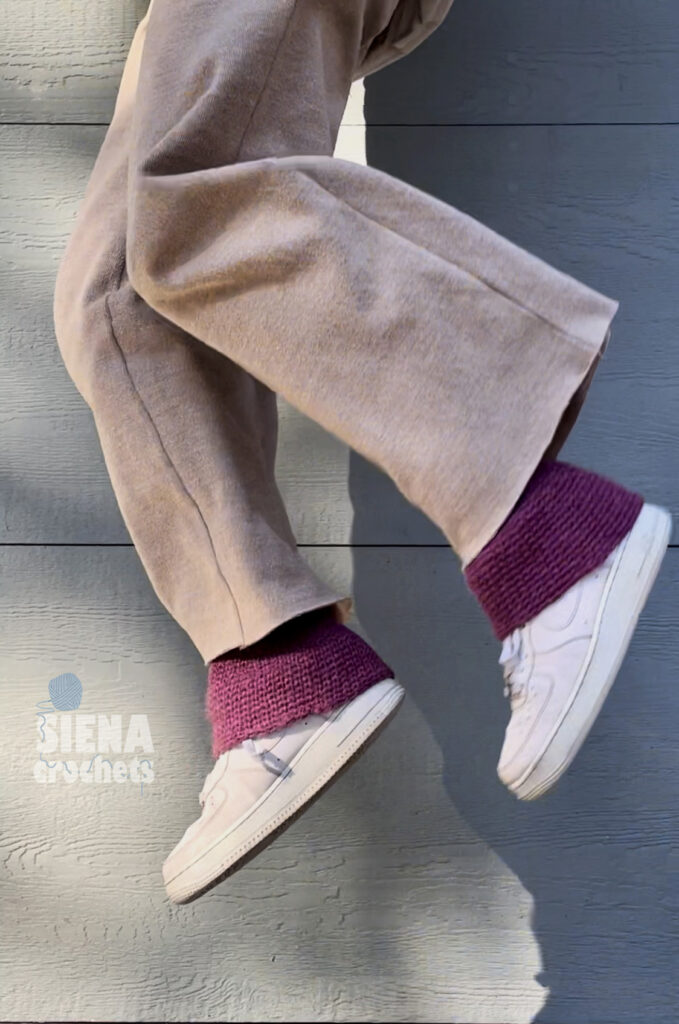
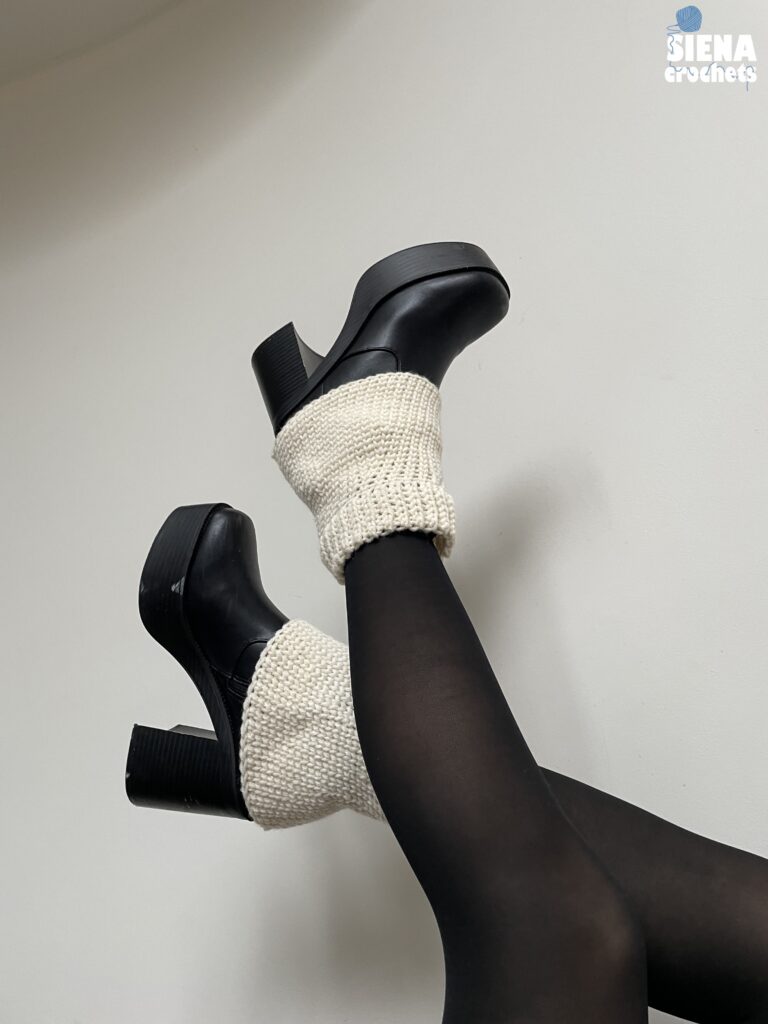
Named after the main character in Isabella Allende’s Violeta, the Violeta Ankle Warmers are a cozy and welcome accessory for the cold. It is crocheted in two main parts: ribbing & the “warmer” bottom part, with 2 straightforward stitches.
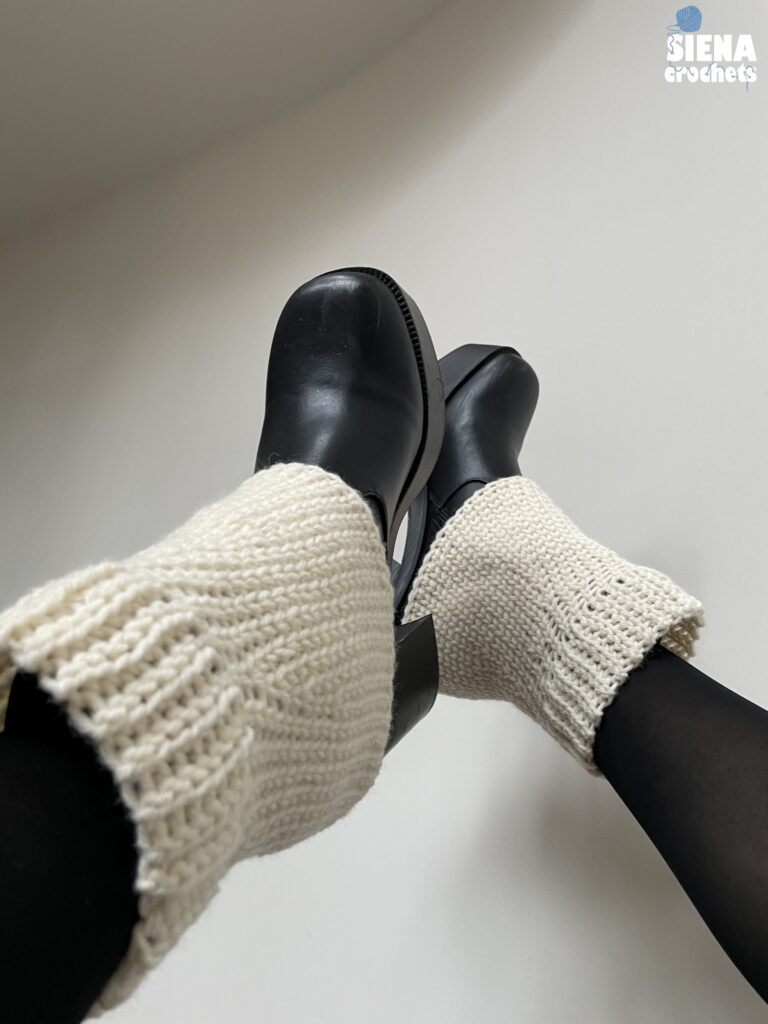
I have been wanting to make my own pair of ankle warmers/boot covers (I’m not sure what description I like best tbh, so I’m using both) for a while. I liked the knit look and wanted something that would be simple, effective, and cute to wear with whatever pair of shoes, but especially my ankle boots.
This is an intuitive pattern which means I will provide the materials and dimensions I used, but you are more than welcome to adjust it to your liking.
I am also thinking of making PDF versions available or a video tutorial, and will leave that information here if I choose to do so in the future! 😊 Let me know if either of those mediums would be of interest to you in a comment below or on my Instagram.
Materials
This is what I used, you may use whatever hook and yarn you’d like, though I recommend using something of similar quality for a similar outcome! Since the pattern is made intuitively, you can size it how you’d like.
Hook: 5.5 mm
Yarn: Wool Ease by Lion Brand Yarn (depending on the skein, I used 1-2) Weight 4
Scissors, Tapestry Needle, Stitch Marker
Pattern Notes
Stitches & Abbreviations
- slst: slip stitch
- sc: single crochet
- ch: chain
- blo: back loop only
- wcs: waistcoat stitch (video tutorial here which helped me when learning this stitch)
Notes
- Pattern is written in US terms
- Ribbing is worked in rows, with the bottom part being worked in the round (use stitch markers as needed)
- Weave in ends as needed
- Time expectations: Each ankle warmer takes me about 2 hours to complete
- See my free pattern policy for any questions regarding distribution, use, and reproduction of this pattern. It is also at the bottom of this page.
Free Crochet Pattern
Ribbing
Row 1: slip knot chain 8 (or as wide as you’d like the ribbing to be)
Row 2: slst into each chain starting in 2nd chain from hook. ch 1 and turn
Row 3: slst into blo. ch 1 and turn
Repeat row 3 until ribbing is long enough to reach around the part of your leg you’d like the leg warmer to sit at. For me, this was 52 rows.
Fold the ribbing in half to connect the long ends together with a slst in each chain.
The dimensions of my ribbing ended up being: 1.5 inches (3.8 cm) wide by 10 inches (25.4 cm) in circumference
Bottom Part
Row 1: Ch 1 and sc in every other row along the ribbing. (Note: skipping every other row is to achieve a tighter look closer to the ribbing. We will be increasing as we go down the leg)
Row 2-3: Start the waistcoat stitch. Tutorial in the round here. Do this stitch in the round. Do not ch 1 between rows. Keep working around and mark the beginning of a row with a chain marker
A Little Bit of Math 🧮
The number of single crochets you have just done will determine the number of stitches you will increase by.
Here’s some context and guidance, but feel free to scroll down for the TLDR if it’s overwhelming.
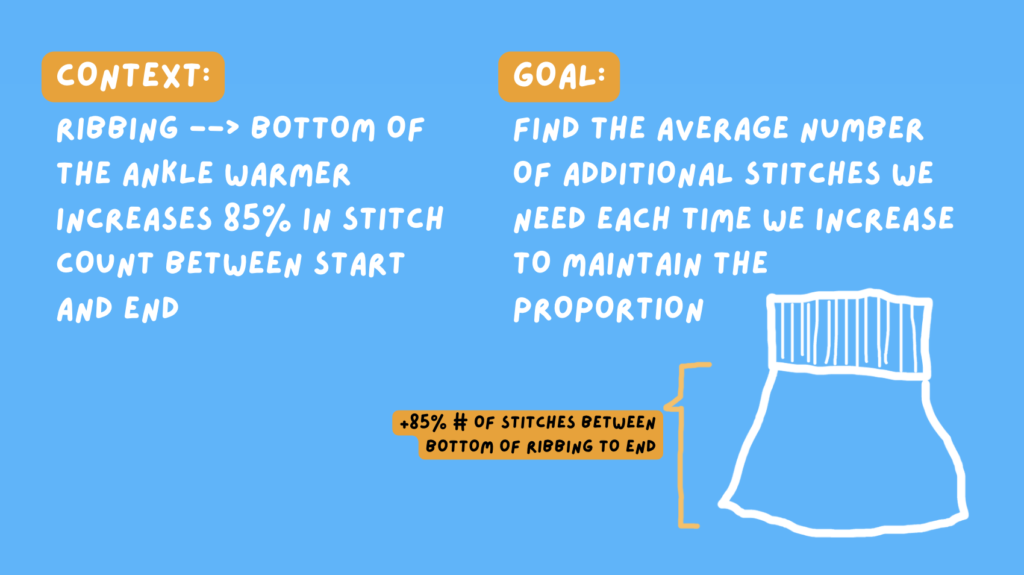
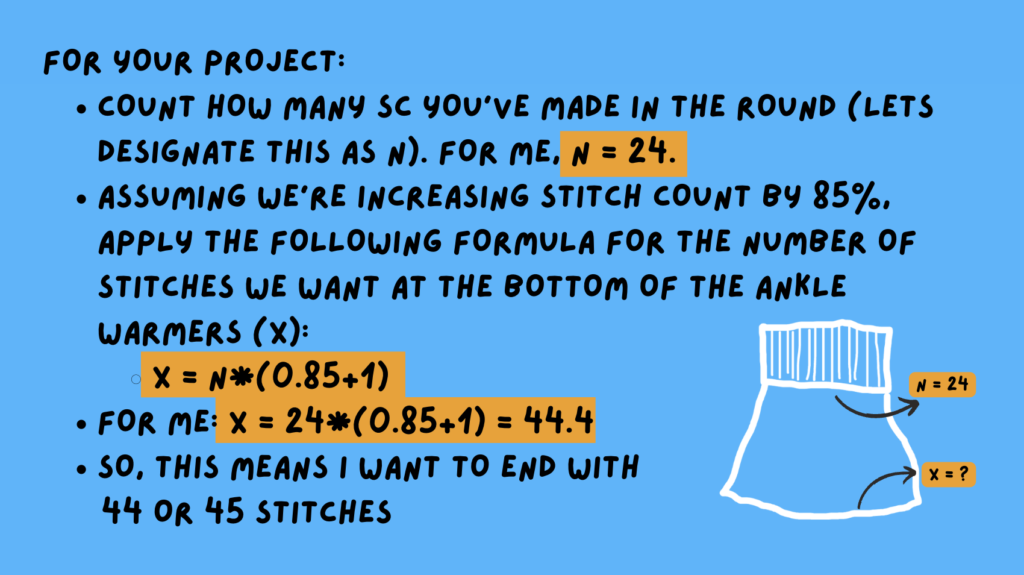
TLDR: take the number of single crochets made at the bottom the ribbing (designated as N) * 1.85 = X. X= number of stitches you want at the end.
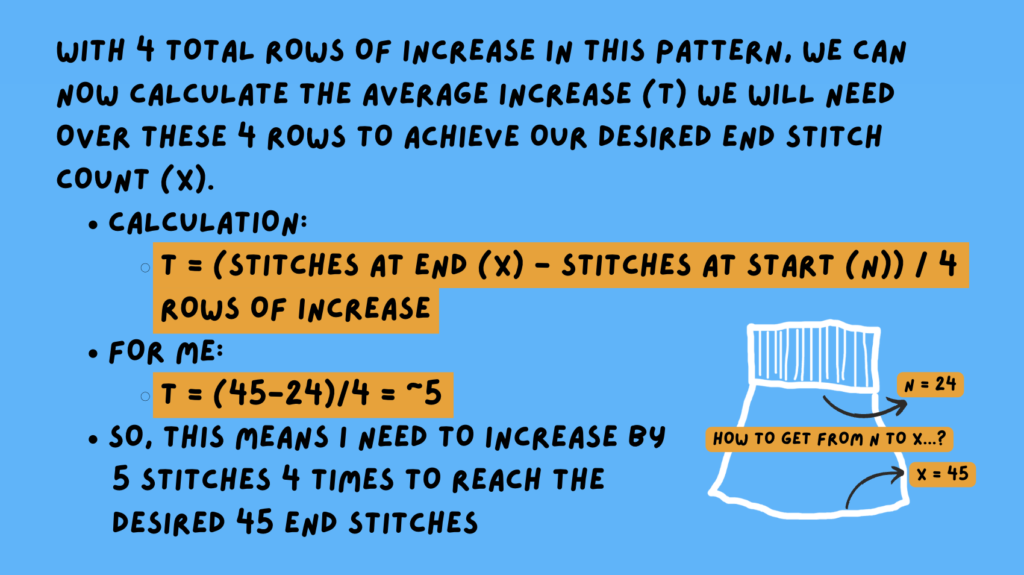
Then, X – N (used above) divided by 4 = T
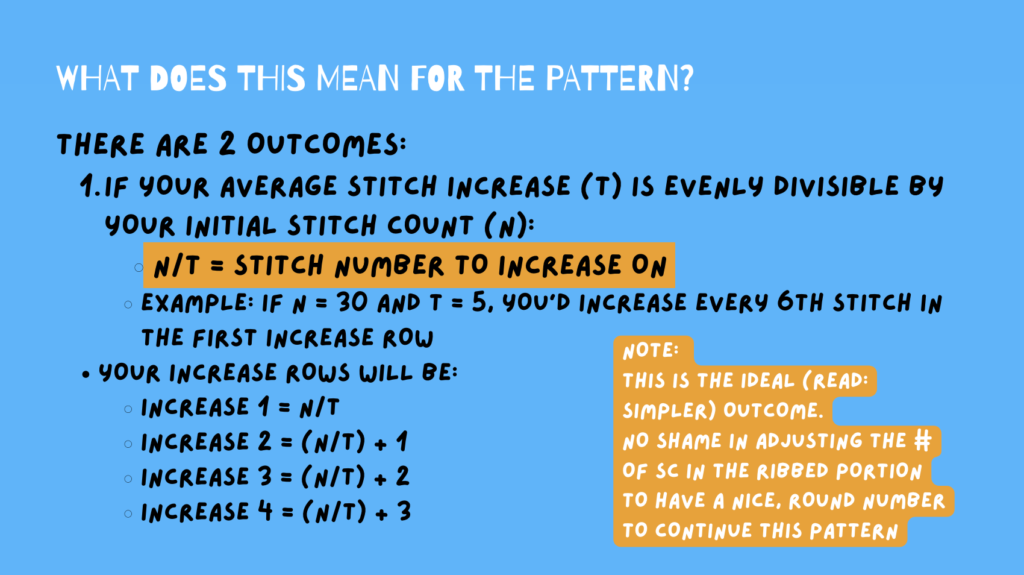
Divide N by T.
If that is a whole number, amazing! You will use that number as the stitch # you’ll increase on in the first increase round. For example if N/T=6, start row 4 by increasing every 6th stitch. The next increase row, you’ll increase on every 7th stitch, and so on.
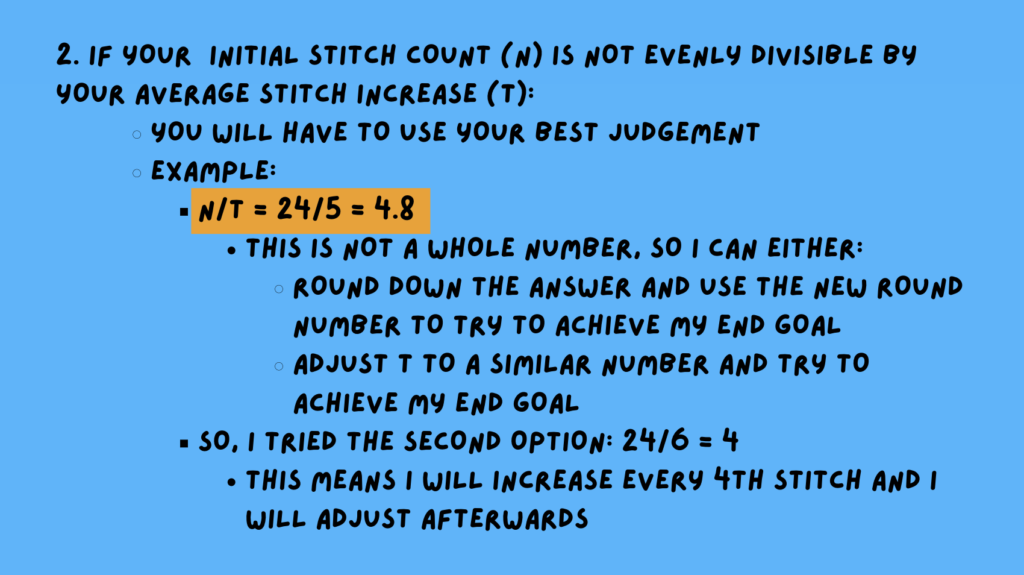
If that is NOT a whole number, I recommend looking at the last two photos above for a walk through in how you can go about determining which stitch to increase on (or just made a few more or less single crochets in the bottom of the ribbing to get a whole number here 🤷♀️. I won’t judge)
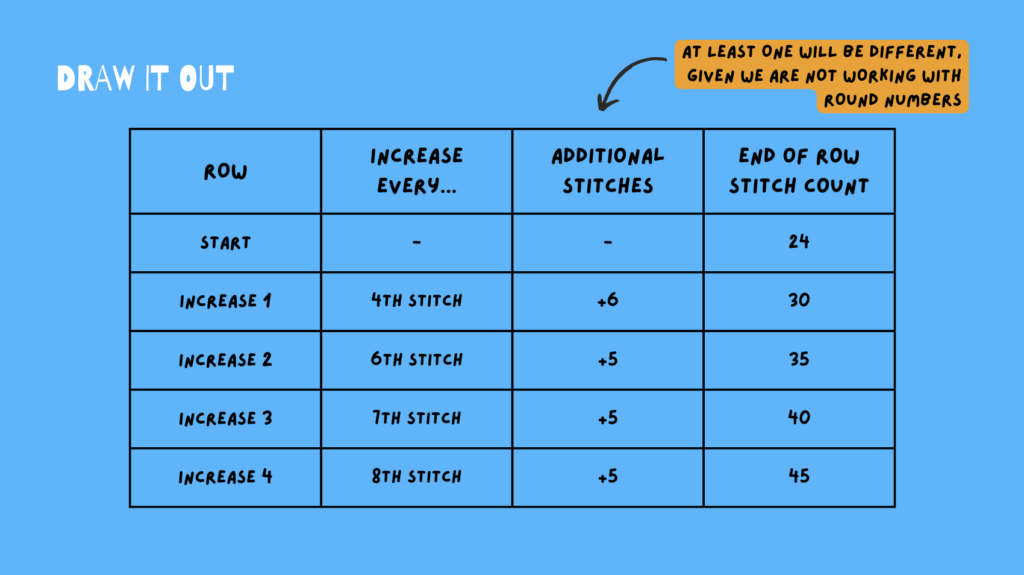
One last note: we will increase the stitch # we increase upon as we work further in the project. See the bottom right table for an example of this in the “increase every…” column. If you have a whole number, this will increase by 1 each time. If not, it may look like the table provided where there is a step jumped.
I hope this math portion was not too painful and helps you scale your increase appropriately!
Now, Back to the Pattern
Please use your calculations above to determine which stitch you will be increasing on. I will use 5 here as an example, though yours may vary.
The project will only be worked in the waistcoat stitch from here forward.
Row 4: increase every 5th stitch
Row 5: waistcoat st each
Row 6: increase every 6th stitch
Row 7: waistcoat st each
Row 8: increase every 7th stitch
Row 9-10: waistcoat st each
Row 11: inc every 8th stitch
Row 12-21: waistcoat st each
At this point, I stopped as I was happy with the length (4.5 in of waistcoat. 6 in total) for using with my boots and sneakers. You may keep going as long as you’d like!
Fasten off and repeat for a second ankle warmer
The Tie
If you’d like more security with the ribbing, we can add a tie to it so that you can keep it up to your liking
Chain until you’re comfortable that you could get this around the part of your leg you’d like to secure it to and some so that you will be able to tie it. Do this twice and interlace with the ribbing, meeting in the back to tie together.
See this tutorial as an example!
Thank you!
Thank you for checking out this pattern. I hope you enjoy your Violeta Ankle Warmers | Boot Covers.
Please tag me or send me a photo of the finished product! I’d love to see them and any feedback you have on this pattern.
Pattern Policy
The photographs and pattern contained in this document are the property of Siena Crochets.
This pattern is for personal use only.
No unauthorized reproduction, in whole or in part, or distribution of this pattern or content is permitted. ALL FINISHED PRODUCTS from this pattern can be used for local sales and sold online in small batches with clear mention of the pattern and artist in the description.
Thank you so much for supporting Siena Crochets! To stay in touch or see more work, visit me on Instagram (siena_crochets)!